Easy to make pizza recipe from the basics without any processed food, colorants or artificial ingredients. Just like we were in Italy.
As I recently have a little time, I was searching on the internet the other day. Trying to get fresh, intriguing tips, inspirational dishes that I’ve never used before, to treat my family with. Searching for a while unfortunately couldn’t come across too many interesting things. Just before I wanted to give up on it, I discovered this fabulous and easy treat simply by chance. The dessert looked so delicious on its photo, that required immediate actions.
It had been easy to imagine just how it is created, how it tastes and just how much boyfriend might love it. Actually, it is very simple to keep happy the man in terms of desserts. Yes, I’m a blessed one. Or possibly he is.Anyhow, I went to the page: Suncakemom and then used the step by step instuctions which were combined with nice graphics of the task. It just makes life faster and easier. I can imagine that it’s a bit of a effort to shoot pics in the midst of cooking in the kitchen as you will often have sticky hands and so i genuinely appreciate the commitment she put in to build this post and recipe easily implemented.
That being said I’m empowered presenting my own, personal recipe in a similar fashion. Many thanks the concept.
I had been tweaking the main recipe to make it for the taste of my family. I can say it had been a terrific success. They prized the taste, the thickness and enjoyed having a delicacy such as this in the midst of a stressful workweek. They ultimately demanded lots more, a lot more. Thus the next time I’m not going to commit the same mistake. I’m gonna multiply the amount to make them delighted.
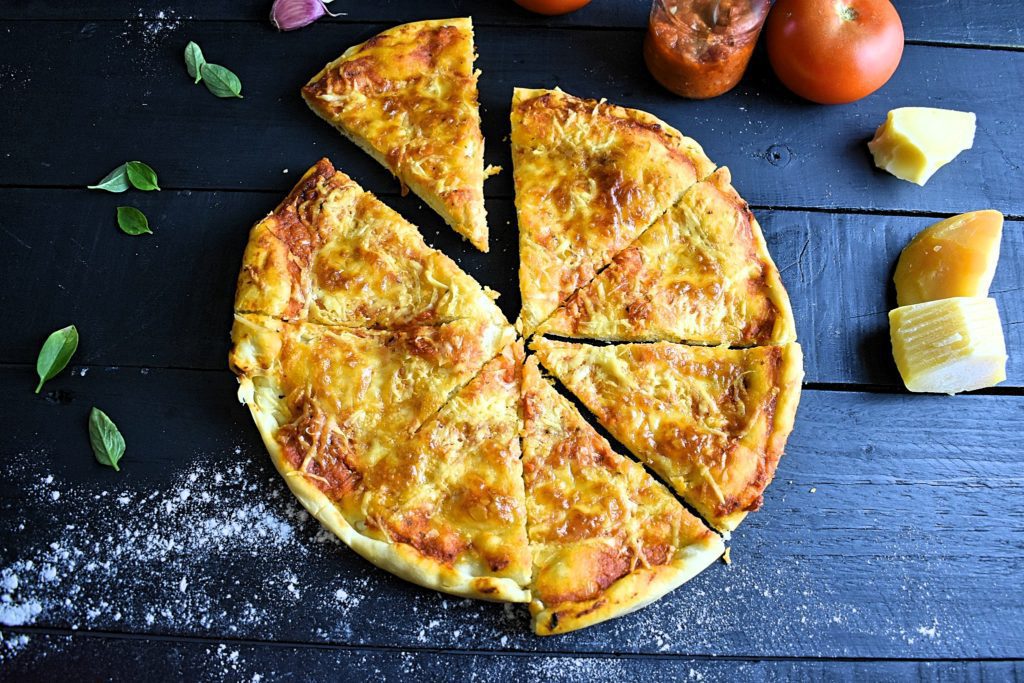
The healthy recipes for pizza recipe is from SunCakeMom
Combine lukewarm milk or water and yeast in a cup. Set it aside for about 5 minutes. If it gets foamy don’t worry. It’s perfectly normal.
In the meantime add the flour, water, olive oil and salt to a big bowl.
Pour the yeast and water mixture into the bowl too; knead until all the flour is incorporated, and the dough is smooth and elastic. If the dough seems to be dry, flaky on the sides and it looks like climbing too much up on the hooks we may add a bit of extra water to it. Be careful and only add one teaspoon at a time.
Leave the pizza dough in the big bowl, cover it with a clean kitchen towel on top and set it aside in a warm place whilst we prepare the pizza toppings. In case the kitchen is cold we may want to pop the bowl with the dough into the oven at no more than 100°F / 40°C. Make sure that it isn’t more than that as too high temperature will kill the yeast before it could raise the dough! Check the temperature several times during this proofing period. As a general rule if it’s too hot for the hands it’s too hot for the dough too. This will take an hour and we know it’s ready when the dough grows about the double of its original size.
Wash tomatoes, cut in quarters and put them into the food chopper with 4 basil leaves, oregano and a pinch of salt to chop and mix them a bit. Try to use fresh herbs as it will really make a difference! (If we feel adventurous then slip in a bit of garlic and fried onion too.)
Pour chopped tomatoes into a frying pan and cook about 5 to 10 minutes on medium heat to get a somewhat thicker texture. Stir whilst cooking. We can skip this step entirely and spread a couple of spoonful tomato directly onto the pizza. (Check out the Low Carb Condiments for detailed Tomato Sauce recipe)
Grate cheese and get it ready to put on.
Take pizza dough out of the bowl onto a floured work surface when we finished preparing toppings, in about 60 minutes.
Divide the dough into 6 oz / 250g balls. Take one out onto a floured surface and cover the rest with a cloth.
Don’t forget to mildly flour the work surface where we are going to work with the dough as it will stick down otherwise. Form one of the dough into a large disk with hands or a rolling pin and lay it on the baking tray. If a pizza shovel (peel) is not available then mind not to put the topping on until the dough isn’t on the tray!
Work from the middle of the dough outwards, using rolling pin or by hands. Stretch the dough until it’s the size of the baking tray. Optionally we can try to master the pizza throwing technique but first just get on with the not that sexy method.
Spoon some sauce into the center of the pizza and spread it out to the edges. Spread it evenly and don’t fall into the temptation to put too much on there as it will make the dough soggy. One tablespoon should do but try not to go over two on a 10 inch / 30cm thin pizza.
Pile on the toppings.
Slide the pizza into the 450°F – 500° / 250°C – 300°C preheated oven and bake it about 15 minutes until crust is golden-brown and the cheese looks toasty. If a pizza stone is used then don’t forget to preheat that as well.
13. Whilst baking the first pizza repeat the process with the second one.
14. We can prepare all the pizzas at once or place some of the dough onto a tray, cover them with transparent foil and place them into the fridge for another day. If a crust forms on the top of the dough before we can prepare them then whisk it with a bit of water. Cover it back and leave it for an hour and the crust should be solved.
Let pizzas cool for a little bit then slice, serve and enjoy!
We can store unprepared dough in the fridge for several days or even freeze them. If we choose to put them into the fridge we have to knead them a little bit every day to show we still love them.
Storing them in the freezer isn’t that taxing luckily. Make sure to brush the dough with a bit of olive oil before foil wrap them and we are good to go.
Comments
Post a Comment